
- 30 August 2025
- LiteManager 5.2 Two-factor authentication
-
Two-factor authentication (authorization) on the LM server using an LM code via email, via your personal SMTP server. New console app for Linux (daemon).
- 05 August 2022
- LiteManager update 5
-
NOIP authorization on LM Server. (NOIP as the central authorization server)
Managing LM Server settings on NOIP. (SSC NOIP) - 21 October 2021
- A new website design LiteManager.org
-
Litemanager — remote support software
- 31 May 2015
- LiteManager remote access tools
-
Free remote access over the Internet with IP or ID connection. QuickSupport mode works without installation for Windows. Demonstration and online Presentation.
Personal accounts on NOIP
Personal accounts of Viewers on NOIP, with detailed logs, licenses keys, address books synced with NOIP.
1. Create new account.
Open NOIP's main window Authorization/Account page, turn on Personal accounts and click on Manage accounts button.
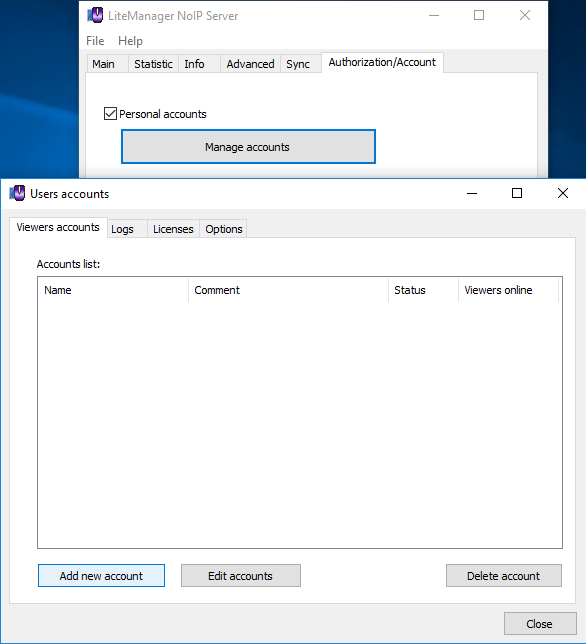
Click on Add new account button.
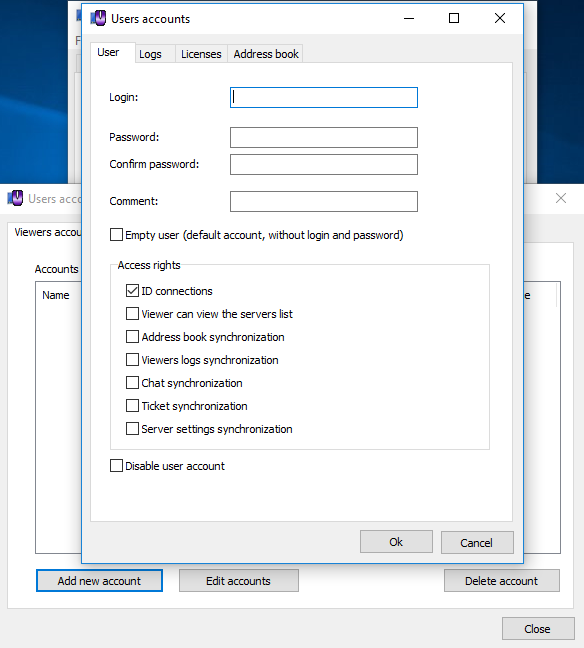
Enter a new name, for example Test and new password. Add a new access right only for ID connections.
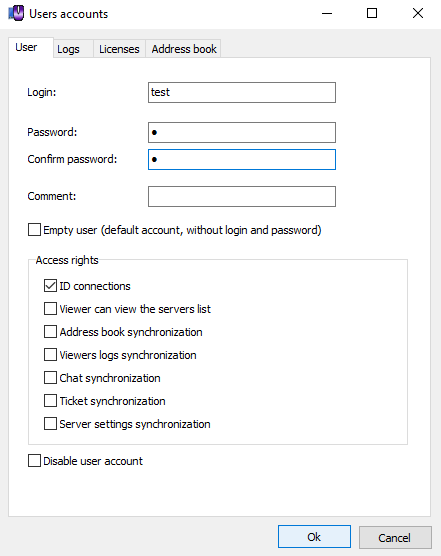
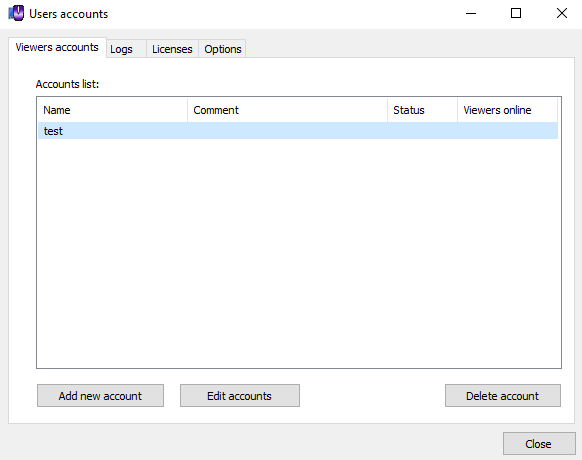
Click on Ok button, the new account will be added in accounts list.
On Viewer's side, open connection by ID window, click on Config button, on Authorization/Account page turn on Personal account and type the user name and password for example Test.
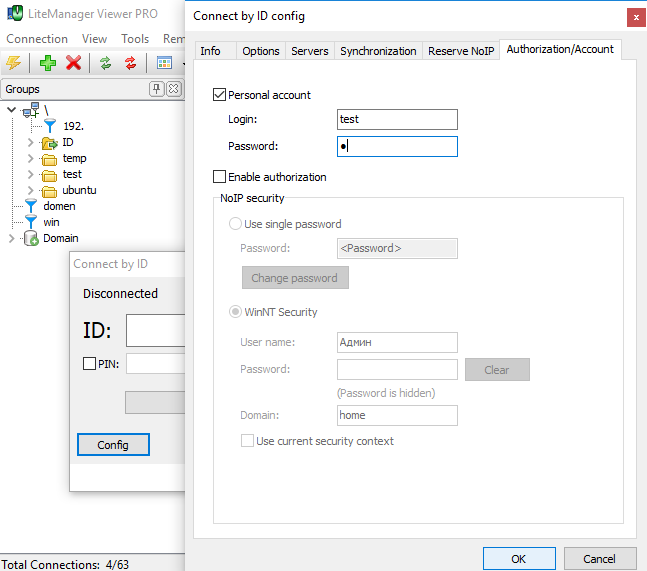
Click on Ok, now the Viewer will work via Personal account.
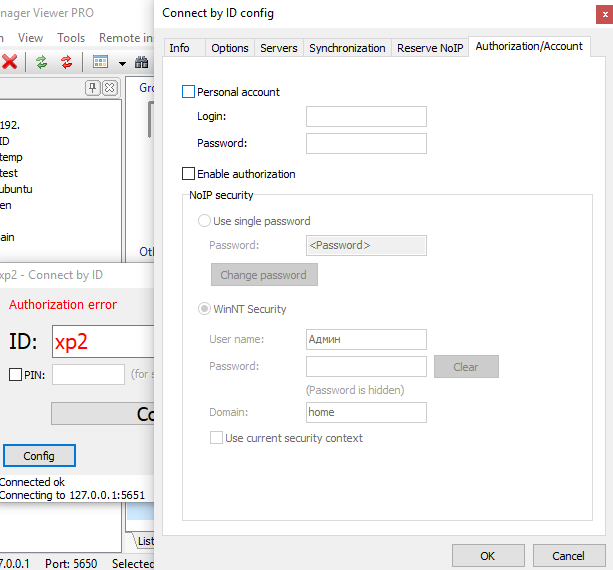
In case of without Personal account, no login and password, the Viewer get the Authorization error.
For providing access to NOIP for Viewers without personal account (without login and password), on NOIP add a new empty account.
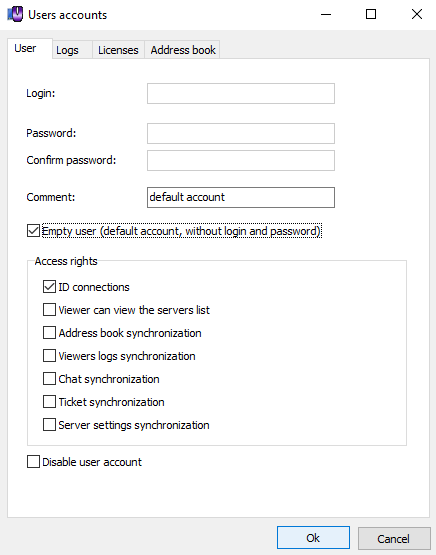
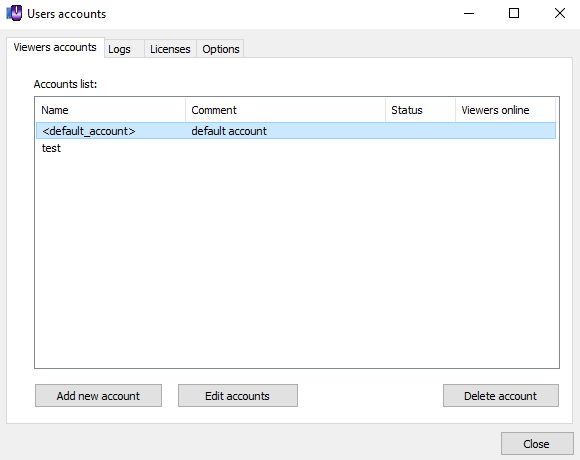
Default account <default_account> will be added in accounts list.
Connecting from Viewer without Personal accounts is available now.

The accounts list shows Viewers online and the status of accounts.
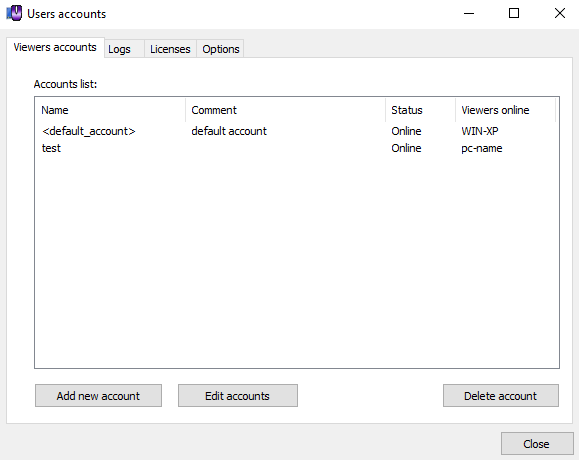
Edit viewer account's settings possible by clicking on Edit account button.
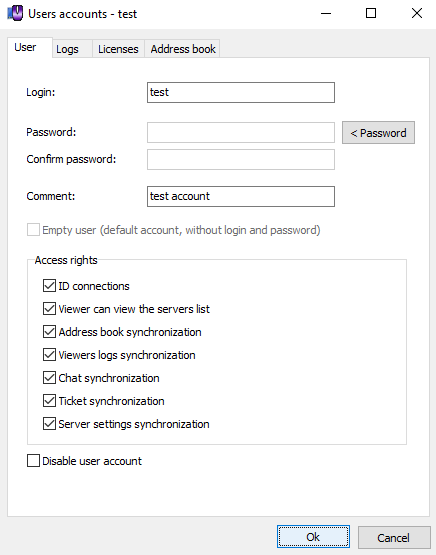
Click on Ok, and changes will be accepted.
Disable the account by checking the option Disable user account.
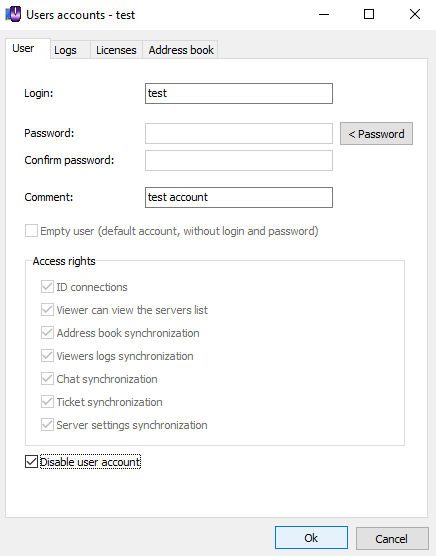
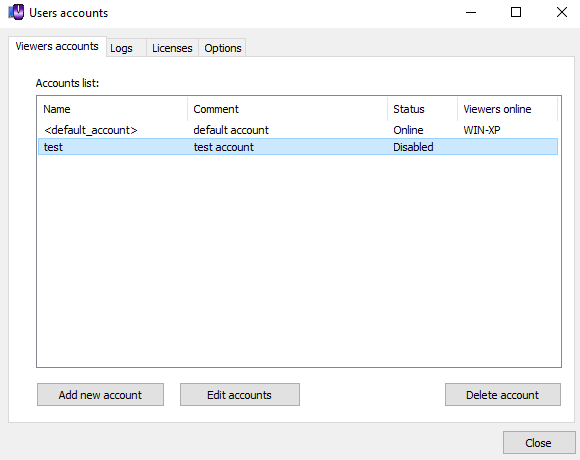
Disabled account has status Disabled.
Create new accounts for each Viewer.
2. Events log.
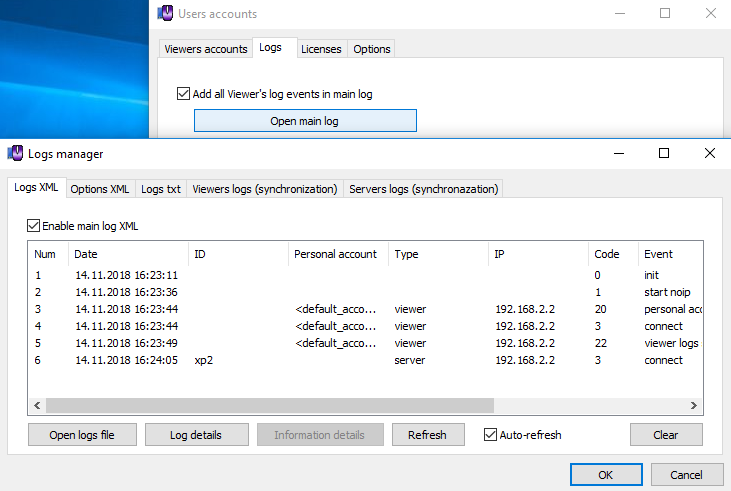
Open Logs page in Users accounts window. You can enable detailed logging of events for all accounts Add all Viewer's log events in main log.

Push on the button Open main log, You can see main log of NOIP and accounts entries in it.
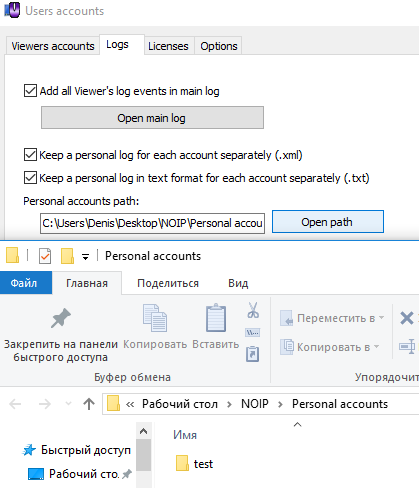
If you have a large number of accounts, it will be more convenient to store the logs of each Viewer separately, for this you need to enable the option Keep a personal log for each account separately in xml or txt format.
Open path you can see the folder where personal account data is stored.
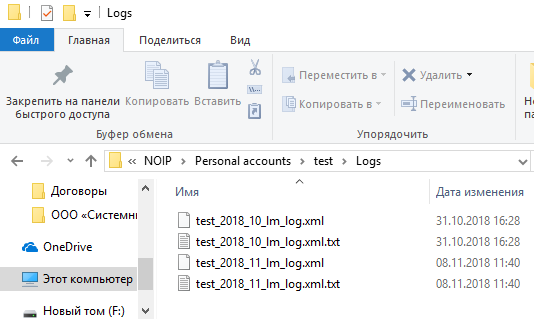
Log files are stored in the Logs subdirectory.
You can view logs by opening the window with account settings, Logs page.
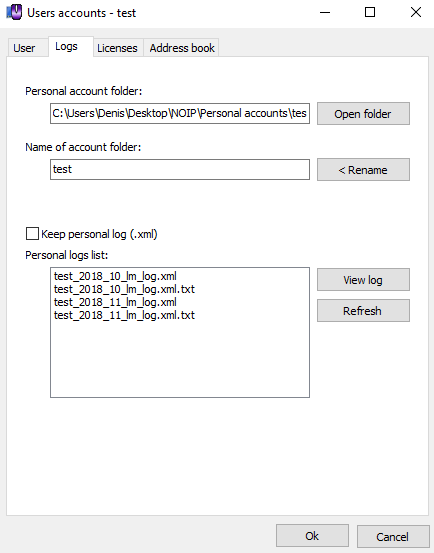
Select the desired log from the list and click View log button.
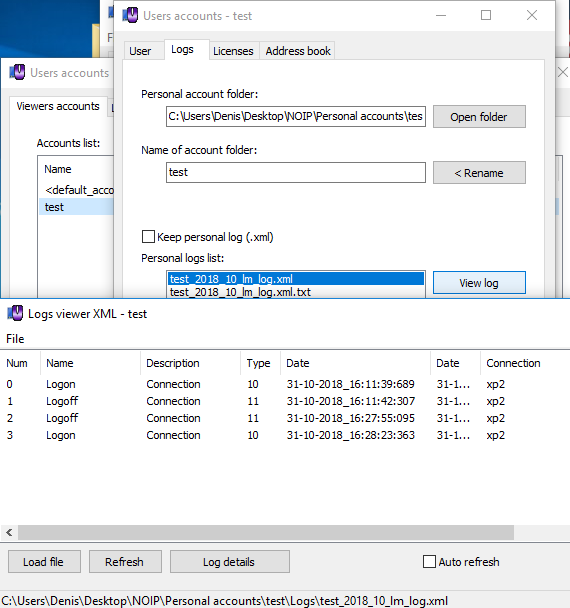
These logs are a copy of event logs from viewers.
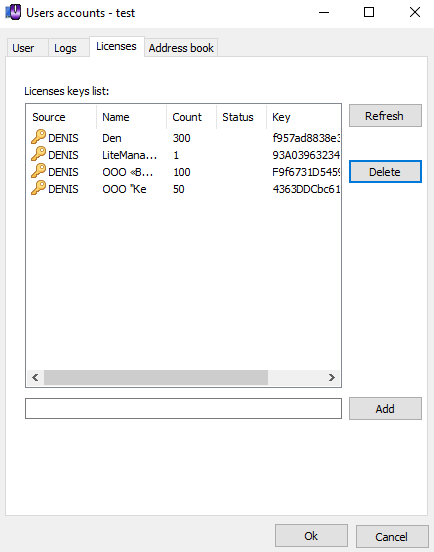
3. Licenses keys.
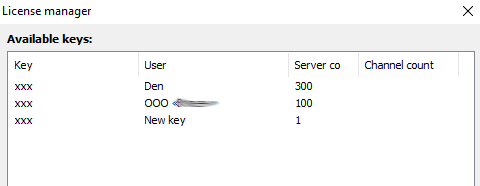
In the account window on the Licenses page you can see a list of licenses keys of Viewer.
Add a new key to the Viewer, enter it in the bottom field and click the Add button.
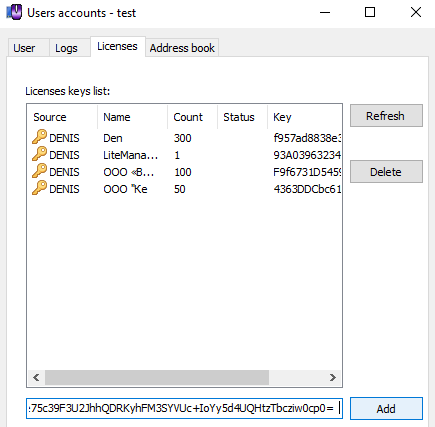
A new key will be visible in the list, the source of the key <NOIP>.
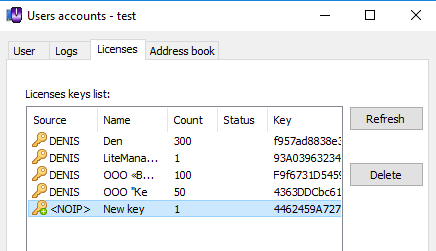
When the Viewer connecting to the NOIP, the key will be automatically transferred from NOIP to the Viewer.

You can delete a key by selecting it from the list and clicking the Delete button.
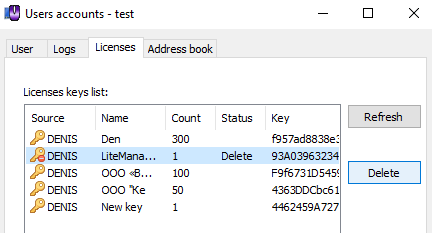
The key will be removed from the license Manager on the Viewer side.
Unnecessary keys with the Delete status can be removed from the list of account licenses if you select the key in the list and click Delete again.
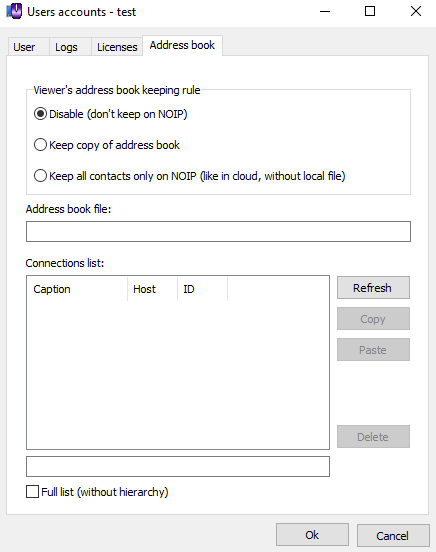
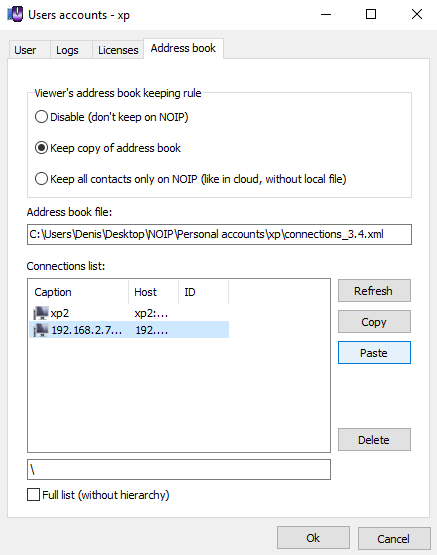
4. Address book. (contacts list)
In the user account window, on the Address book page, you can enable the Viewer's contacts (address book) keeping rule on NOIP.
You can Keep a copy of the Viewer address book on NOIP.
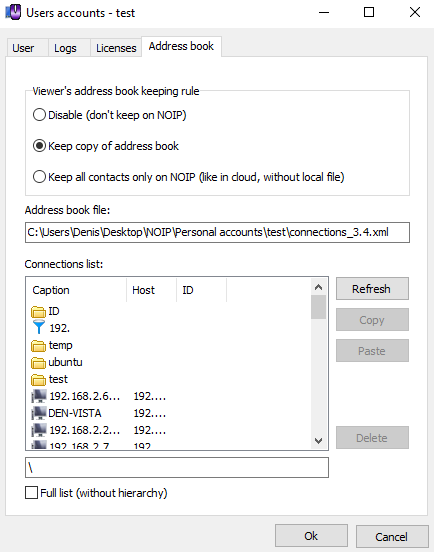
Contacts can be copied between two Accounts, select the desired contact from the list and click Copy.
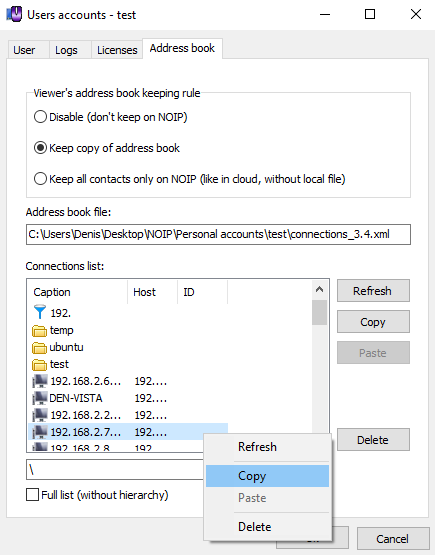
Open another user's account and add the copied contact by clicking the Paste button.
You can store all your Viewer's contacts on the NOIP, the local file Connections_3.4.the xml will be empty, use the rule Keep all contacts only on NOIP.
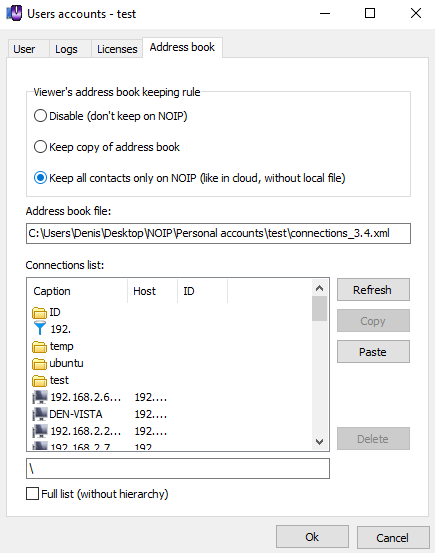
You can remove contacts from the list by clicking Delete. It takes some time, usually a few seconds, to transfer changes from NOIP to Viewer. Changes made by the user on the Viewer, adding or deleting contacts will also be transferred to NOIP.
5. Linking to the Domain Account. (WinNT security)
You can link a NOIP account with a Winodws account, so that when a Windows user is authorized under a certain account, a NOIP account will be automatically linked to him, for this it is necessary to enable the WinNT Security System on the Authorization tab.
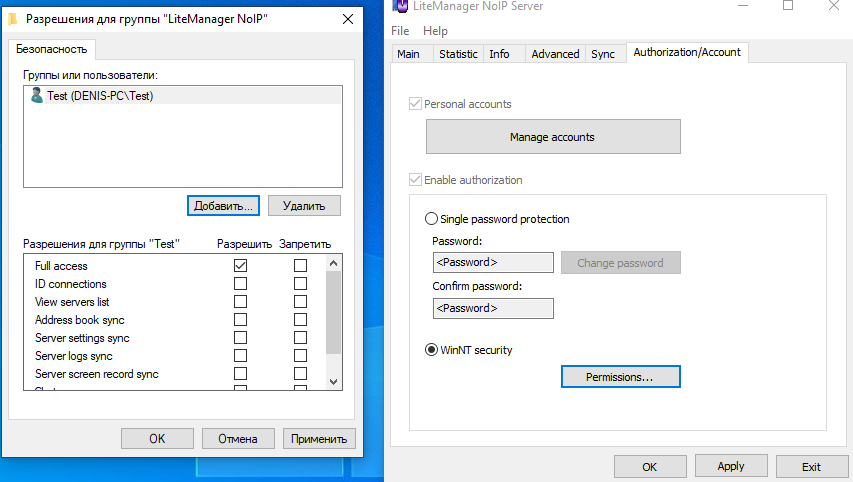
The WinNT security permissions specify a user account with full access to NOIP.
Now we will specify the NOIP account that will be automatically linked to this account. Select the desired account and on the Advanced tab, check the Link to domain account checkbox, then click the Domain account button and specify the user account to which we will link this NOIP account.
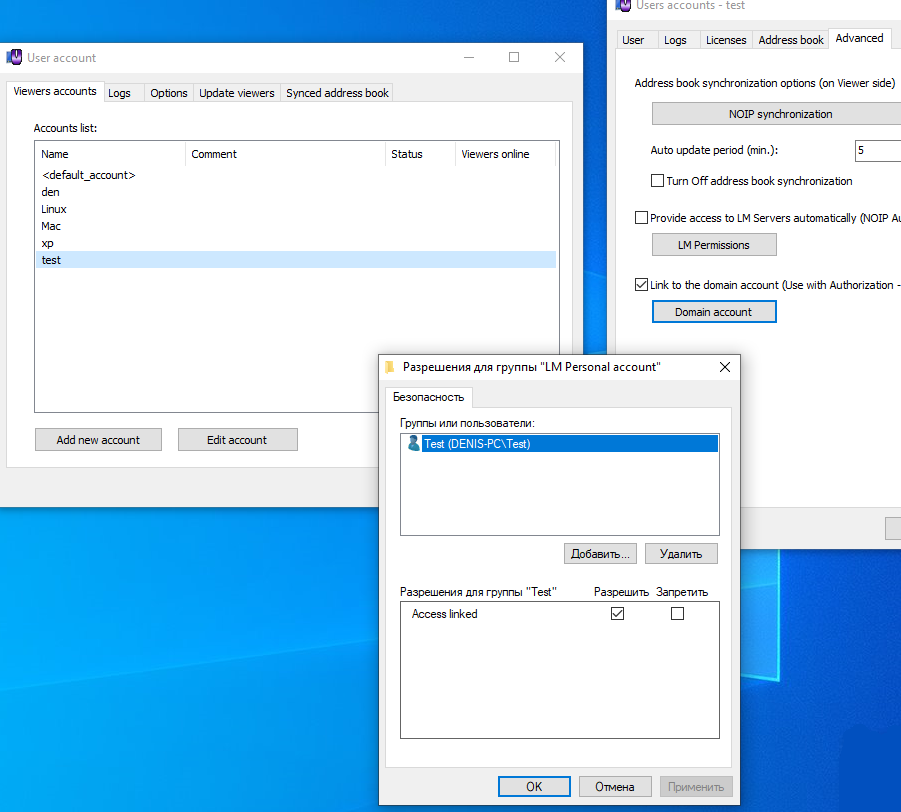
It is not necessary to use domain accounts, you can also specify a local account or group.
After passing the WinNT authorization by the Viewer, a NOIP account will be automatically linked to him.
Online Help.
